Windows has a preinstalled application called Remote Desktop Connection which you can use for connecting to your VPS. You will also find that the slug for this app is RDP coming from the extension type of this file. This example is for Windows 10. Other Windows OS are similar.
Usually, A VPS Provider will send to their clients an e-mail containing the IP, port, username and default password for the purchased VPS.
For connecting to your new VPS/Dedicated Server you have to follow a few easy steps.
STEP 1,2
Search for the Remote Desktop Connection app on your PC. Windows has it preinstalled so you don’t need to download it from the internet.

STEP 3,4
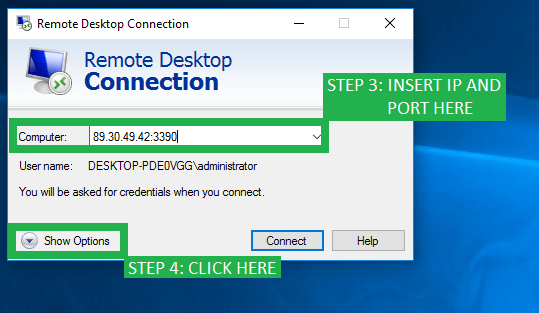
The first window of RDP is asking for the Computer field. You have to fill in with the IP and port you get in your e-mail from your VPS provider.
The default username is usually filled in as “Administrator” or “XXXX\administrator” and most of the times you don’t have to change it.
Click on “Show Options” button in the bottom left-hand corner of the RDP window.

STEP 5,6
Here you can modify the “Username” field with the username provided in the credentials e-mail you have received from your VPS provider.

In order to save an instance of this RDP for easier access, you have to click the “Save As” button.

STEP 7,8
Give a name to your VPS and choose the location where you want to save it on your PC.
Click “Save” in the bottom right-hand corner of the window.

STEP 9
A shortcut of your VPS should be visible in the location where you saved it. In this case, it is on the Desktop. You can connect to your VPS later on using this shortcut.
At this stage, the Remote Desktop Connection will go back to the previous window where you will have to click on the “Connect” button in order to actually connect to your VPS.
Also, you can choose to save the credentials. In this way, when you will connect to your VPS in the future, you will not have to provide the credentials.

STEP 10,11
The next step is to provide your initial password of the VPS. At this stage, you can choose to remember this set of credentials for future use.
It is very important to change your password once you successfully login to your VPS. See here how to change your VPS password.
Click “OK” to move to the next step.

STEP 12
When you first login to a fresh VPS this window will show up. You have to click the “Yes” button in the bottom of the window.
Also, you can choose to skip this step when you login to your VPS in the future.

Now, the login process takes place and should not take more than a few seconds.

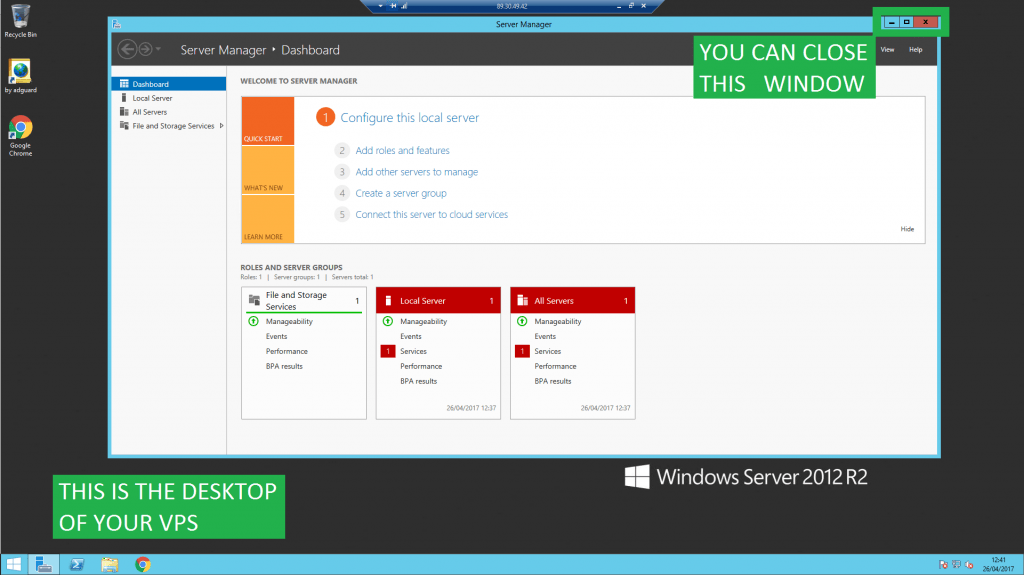
The first login to your VPS will usually show a “Server Manager” window where all the stats can be checked. However, this may vary according to your VPS Provider.


